
Attendance Verification with QR Code
- Tired of manually recording Attendance for Event after Event, week after week?
- Ready to take advantage of technology to streamline the Attendance process whether online or in person?
- Ready to say goodbye to paper or emailed Attendance Verification forms that you must manually record and file for CLE Events that require Event codes to be submitted?
- Ready to let your Attendees confirm their own Attendance instead of having to make note of every Attendee in a Live or Online Event?
Then read on about Attendance Verification in UniversitySite.
Overview for Instructors
This guide provides a quick overview of the new Attendance Verification feature, designed to streamline Event Attendance tracking and verification.
Key Features (TLDR)
- Verification Forms: New forms for Attendees to submit their verification.
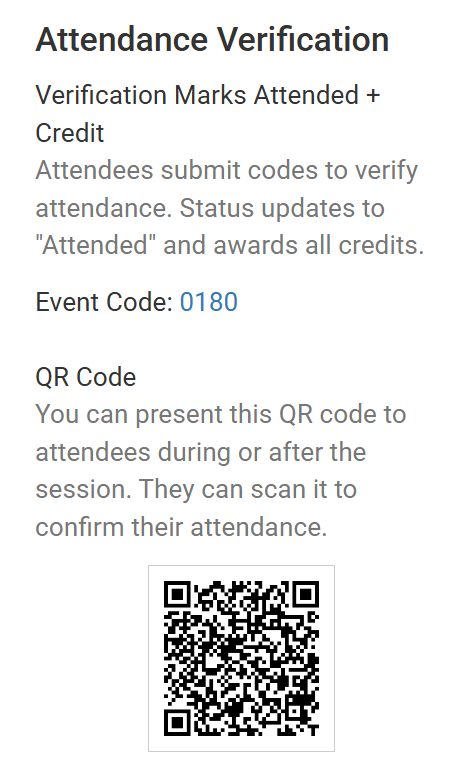
- QR Code: Attendees can confirm their presence by scanning a QR code and entering the Event code/s on the Attendance Verification form online.
- Email Notifications: (QR alternative) Automated or manual emails to provide Attendees access to the Attendance Verification form for their Event.
- Event Codes: Unique codes for each Event to ensure accurate tracking.
- Optionally Include Evaluation Request: If your Event is configured to include an Evaluation, this process seamlessly integrates this as the final step after entering the 4 digit code/s.
How to Use Attendance Verification
- Enable Verification:
- Create a new or edit an existing Event.
-
Enable Attendance Verification by choosing one of the three verification methods:

New Attendance Verification Features
- Enter our own or use the auto-generated event code. (You can add another if needed by clicking in the field and typing.)
- Choose Delivery Method for Email of Verification Form Link
- Manual Send - If you want to manually send them from the Registrants tab yourself (recommend for CLE Events).
- Auto-Send - If you just want to allow Attendees to verify their own Attendance for non-CLE Events.
- Save Event.
- During the Live Event, share the Event code/s as appropriate.
- At the close of the Event display the QR code for Attendees online and live to verify their own Attendance.
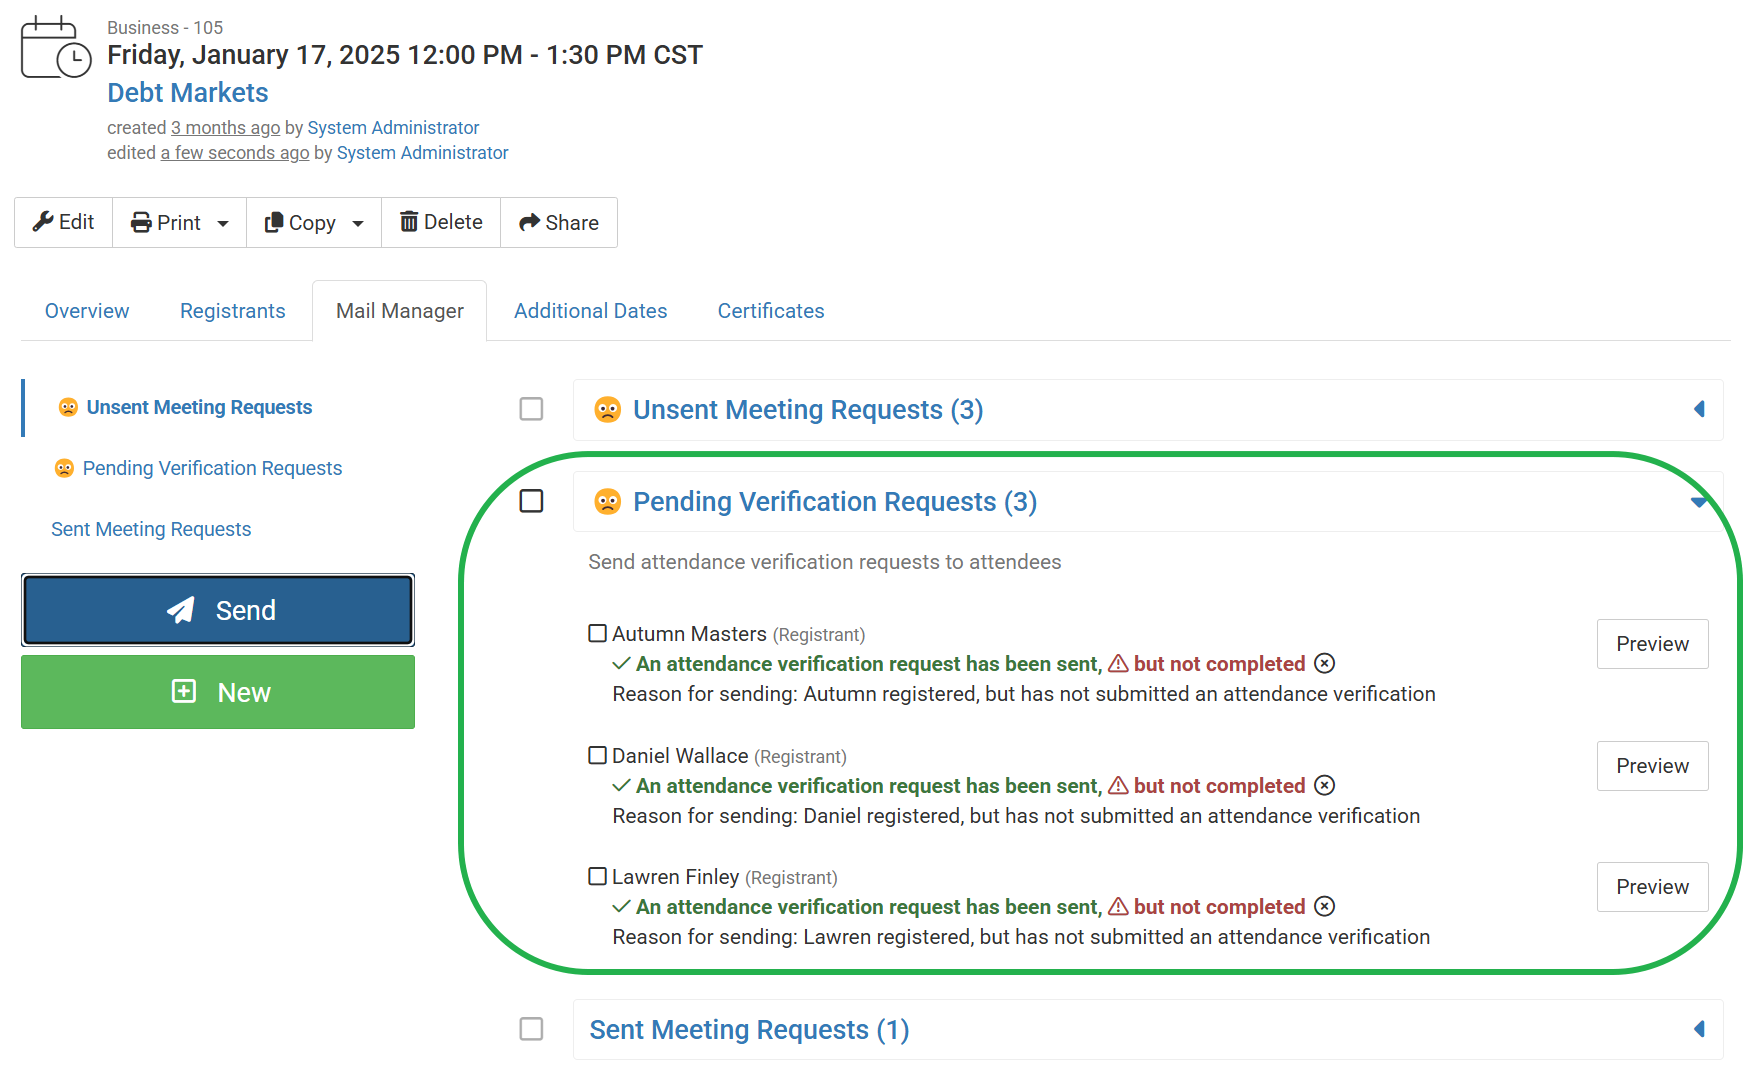
- If not using auto-send, manually send verification form emails to Attendees.
-
You can either send them from the Attendance Verification panel on the left all at once or individually from the Rosters on the right (online and/or physical locations).

Multiple ways to send verification requests
-


Notes: Event codes are displayed on the overview and Registrants tabs.
How Attendees Submit Verification:
-
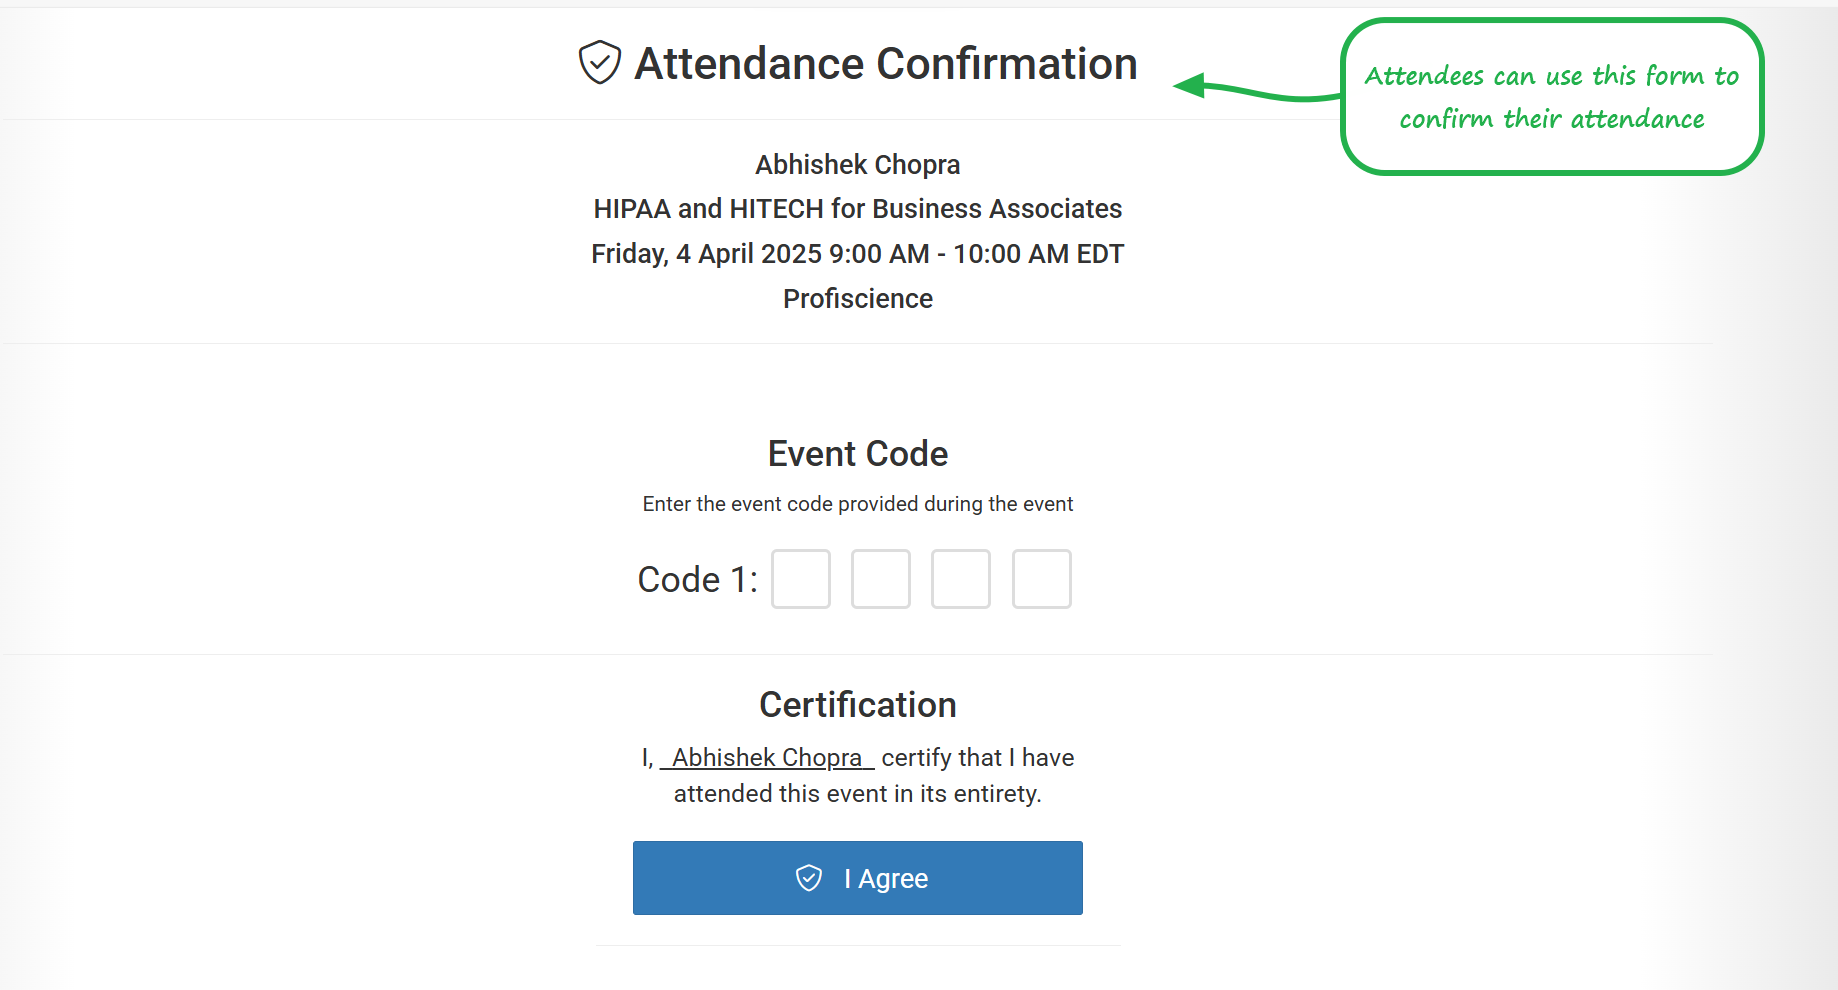
Attendees can use the QR code to access the Attendance Verification form.
OR
- Attendees receive an email with a link to the verification form.
- Enter the Event code(s) to confirm Attendance.
- Optionally respond to the request for feedback for an Evaluation.
Tracking and Managing Verifications:
-
Use the side panel to send and track the status of sent and pending verifications.

- Use Mail Manager tab to send/resend verification emails.

Tips for Success
- Automate Notifications: Enable automatic sending of verification forms after the Event ends.
- Monitor Status: Regularly check the side panel and Mail Manager for updates.
- Customize Templates: Tailor email templates to fit your Event's needs.
This guide covers the essentials to get you started with the new Attendance verification feature.