
Print a Sign-in Sheet
Print a sign-in sheet for a Live Event so attendees can sign in on paper. The sheet lists everyone registered and downloads as a Word document you can print or edit. Anyone who can open the Event in InstructorSite can print it from the Event's page.
If your screens look different from these, your site is still on the previous design. The tasks are the same, but some labels and their places differ.
Print a Sign-in Sheet
- In InstructorSite, select Live Events.
- Select the Event's name.
You can also find the Event with Search in the top bar. It's listed under Live Events. - Select Print.
If Print opens a menu, select Sign-in-Sheets. - If the Event has more than one location, check the locations you need, then select Next.
Online counts as a location. - On the Print tab, choose Built-in or Custom under Choose a template.
You only see this choice if your site has a custom sheet. - Choose the template from the list.
- Optionally, change the number of blank rows for walk-ins in Extra attendee placeholders. It starts at 10.
- Under Attendees, keep Print all attendees, or print only the members of one of your Audiences.
- Select Submit.
The sheet downloads as a Word document. Several locations download together in a zip file.
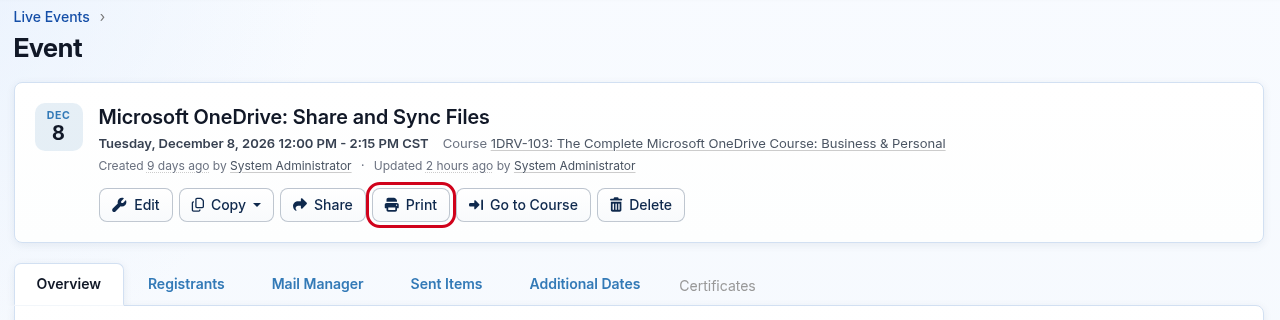
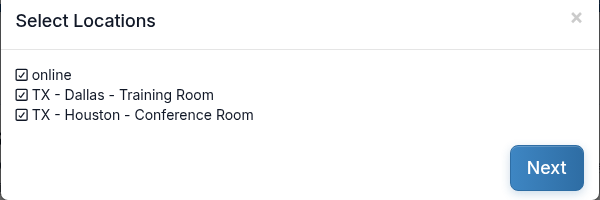
Online attendees get their own sheet, called the online roster. Your firm may have renamed Live Events in the top bar.
What's on the Sheet
- The Course, Event date, time, duration and credits. Classroom sheets also show the location and room.
- A table for the speakers, then a table of registered attendees, each with a column for a signature.
- Attendees are sorted by last name. People on standby aren't listed.
- The Legacy template has Time In and Time Out columns.
Make a Custom Sign-in Sheet
- Open the sign-in sheet window as in steps 1–4 above.
- Select the Customize tab.
- Under Pick a Template to download, choose a template, then select Download.
- Unzip the file and edit Classroom.docx in Word. Keep Online.docx in the folder, and edit it too if you print online rosters.
- Zip the files again. The zip file's name becomes the template's name.
- Under Select a zip file to add a Custom Template, choose your zip file.
- Select Create Template.
Your template appears under Custom on the Print tab.
For full instructions, see Create Your Own Custom Event Sign-In Sheet.
Frequently Asked Questions
Why is my sign-in sheet missing someone?
Check that the person is registered, not on standby. The sheet lists registered attendees only. If you chose one Audience under Attendees, people outside it are left out too.
Can I print sign-in sheets for several Events at once?
No. Print each Event from its own page. You can print several locations of one Event at once.
Can I add a field, such as the attendee's department?
Yes, for fields a custom template supports. These include job title, office, email, manager and your site's custom user fields. Department isn't one of them unless your site keeps it in a custom user field.
Can I print the roster before the Event?
Yes. The sign-in sheet is available before the Event and lists everyone registered so far.
Where do I keep the signed sheets?
Scan them and upload them on the Event's Registrants tab, under Attached Sign-in-Sheets. Then record attendance. See Record Attendance for an Event.
Do I still need sign-in sheets if I use attendance verification?
Not always. Attendees can confirm their own attendance with a QR code instead. See Attendance Verification with QR Code.