
Create Your Own Custom Event Sign-In Sheet
Steps
- Select an Event from the Live Events page in InstructorSite.
-
Select Print and select Sign-in-Sheets.

-
Select the Customize tab and click Download.
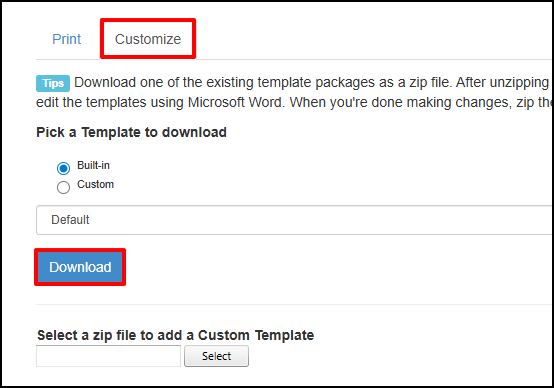
- Extract the contents of the downloaded default.zip file.
- Open the ReadMe to see what variables we support and if needed how to add fields to your document if you are making your own not customizing an existing template. Make special note that Table variables can ONLY be used inside of tables in the word document, whereas global variables can be used anywhere in the document.
- Each new sign-in sheet should have all three templates in it so edit and revise EACH of the templates (Online.docx, Classroom.docx, and All.docx) but keep them the same name.
- Rename the "default" folder to be the name you want your new template to have e.g. "IT Sign in sheet."
- Zip this folder e.g. IT Sign in sheet.zip for example.
- Go back to ANY Event and view it.
- Click the Print button and choose sign-in sheet again.
- Select the Customize tab again.
- This time use the Select button to select and then upload your new sign-in sheet zip (in my example you would upload "It Sign in Sheet.zip."
- From any Event you want to use this new template view the Event.
- Click Print and choose Sign-in sheets.
- Choose "Custom" under choose a template and select the template you want to use.
- Decide if you want to change the other field settings below and click the big blue Submit button.
- This produces a Word document that you can download and print which is your custom sign-in sheet.

